GENERAL QUESTIONS [ NOTICE ] SD Speed Class 10 is more recommended for SD card recording
Usually, you will buy an IP CAM because you want to see what's happenning in your house when you are in the office, in the coffee shop, or when you are traveling around the world. So, you install the IP CAM on the ceilling of your living room or garage, and connect this IP CAM to your home network either through wired internet or WiFi.
Since most of the home network supports DHCP, the IP CAM should be easily connected to the Internet. Now, you think that you can see the video of the IP CAM. But, actually, you have not finished the installation. When you are in the office or coffee shop, if you want to see your IP CAM video, you need to know the IP address or domain name of the IP CAM. So, you need to figure out what's the meanings of these terms like DDNS, public/private IP ,virtual servers, port mapping.....etc.
After some hard works, you will give up because it's very not easy.
StarVedia understand the pain users face when they are using the IP CAM. So, the users need only to do two things to see the video of the IP CAM.
You see that, you only need to remember the ID/password of the IP CAM. You can then see the IP CAM video any where in the world. It's just this easy.
Although it's very easy to see the IP CAM video, but it's password protected. As long as you keep your password in high secrecy, no other people will see your IP CAM video without your permission.
The video is compressed using the MPEG4 compression technology, this is a very high efficient compression standard. The quality of a video with 640x480 resolution is very good if the bandwidth is more than 256kbps. And this bandwidth is pretty easy in the home internet connection. So, the video quality should be good if you are using ADSL or cable modem.
IP CAMERAS
When the IP Cam is connected to the Internet and working correctly, the red led light will be on constantly. If the red led light is flashing, it's probably because there is some network connecting problem. Please check the network connection again and follow the instructions on the user manual to set it up again.
When the IP Cam is connected using wireless network and the video quality is not good, it's probably because the distance of the IP Cam is too far away from the wireless AP(Access Point) or WiFi router, or there are too many devices connected to the AP, or maybe because the WiFi antenna is not in the best position. Please try to figure out which one is the cause of the problem and you can then fix this problem.
You can not and don't need to adjust the focus of the network camera. The focus is pre-adjusted in the factory and the effective focus is in wide range from 50cm to infinity, so, in normal application, you can see clear picture with the camera.
The viewing angle of the IP Cam is about 60 degrees.
When using the IP Cam to see a long-distance object, whether it's clear or not depends on the size of the object. Usually when your eyes can see something clearly in that distance, the IP Cam can also see that object clearly in about the same distance.
The easiest way to solve this problem is to reset the IP Cam to the factory default. Please stick on the reset button on the rear panel of the IP Cam for more than 3 seconds and release it. The IP Cam will then restart to the factory default. The default administrator account is "admin", administrator password is empty. The default video-play password is "ipcam". You can adjust these account and passwords by using the browser to login into the IP Cam and do the needed modifications.
There is a microphone inside the IP Cam. If you can see the video from the accompanied CamView software, but can not hear the audio sound, please check the followings:
- 1. Check if the speaker of the computer is turned on, you can try to play a audio file on the computer to verify this.
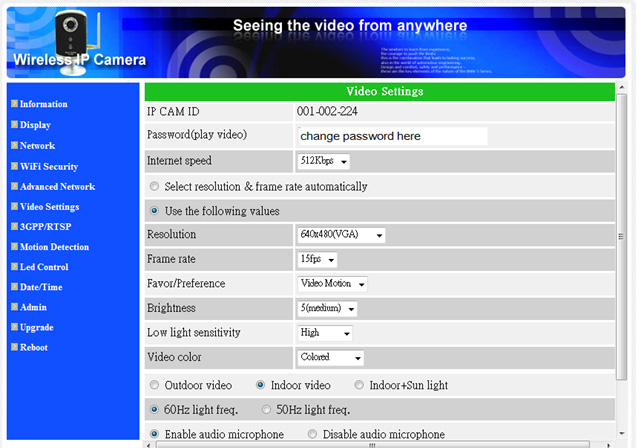
- 2. Check if the microphone on the IP Cam is enabled. Please login into the web configuration page of the IP Cam, select the "video" settings, click the "Enable audio microphone" choice.
It's probably because the internet bandwidth (internet speed) is not big enough. Please try to apply for a better internet connection from your Internet Service Provider or decrease the bandwidth settings of the IP Cam. You can adjust the bandwidth requirement of the IP Cam either from the CamView software or login into the web configuration page of the IP Cam to do the modification.
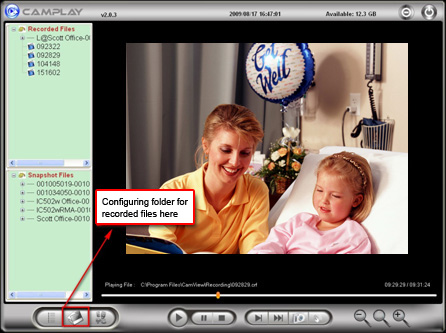
You can do the video recording of the network camera either to the computers through CamView software or to NAS devices or SD card depends on your requirement. The accompanied CamPlay software is then needed to play back the recorded video files.
The sensor used in the IP Cam is the CMOS type. Although the sensitivity of the sensor is already very good compared to other products CMOS sensor, there is still a limitation. If the video is still too dark for your environment, please try to increase the lightness of the light source or you can adjust the "low light sensitivity" in the "video settings" page. But need to keep in mind that after the "low light sensitivit" is increased, the picture exposure time is increased, there could be some video tail in the video. The models IC212/w and IC602 with IR led inside could help on some of the very tough environment. But please be noticed that when the IR led is turned on in the dark room, the video will be black and white only.
If the IP camera is directly connected to your PC/notebook computer using an Ethernet cable, the IP camera will use an IP address called "auto IP" with IP address 169.254.xxx.xxx. If your PC/notebook computer is configured to DHCP, it will also use an "auto IP" address. But this will take about one minute after the IP camera is connected to the computer and you need to make sure that the WiFi interface on your PC/notebook computer is disabled. After about one minute, you can run the CamView software to access the IP camera, the CAM ID should be displayed on the "auto-search" list. You can then see the video by double clicking the CAM ID icon.
But you need to know that in this situation, other local or remote computer can not see the video.
3GPP/ISMA is using RTSP protocol for 3G mobile phone to display the video stream from some network devices, including IP camera. The StarVedia IP cameras support the RTSP protocol needed by 3GPP/ISMA. Users only need to access the address rtsp://ip_cam_address/ID.password on the 3G mobile phone to access the video of the IP camera. Where ip_cam_address is the public IP address of the IP camera. Different 3G mobile phone may need different operation to be able to key in the rtsp address, please contact the 3G mobile phone customer service for more details.
One big difference between StarVedia and other’s IP cameras is that the StarVedia has 3G Mobile Software that users don’t need to use the RTSP method any more, just key in the ID/password of the IP camera is enough. Please refer to https://www.starvedia.com/download.html for more information.
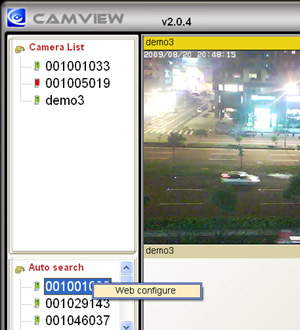
1. Please find your IP cam with “auto-search” under CamView. When your computer and your IP cam are on the same sub-net, usually the same router, you can find IP cam on "auto-search".
2. Right click your IP cam and go into web configuration.
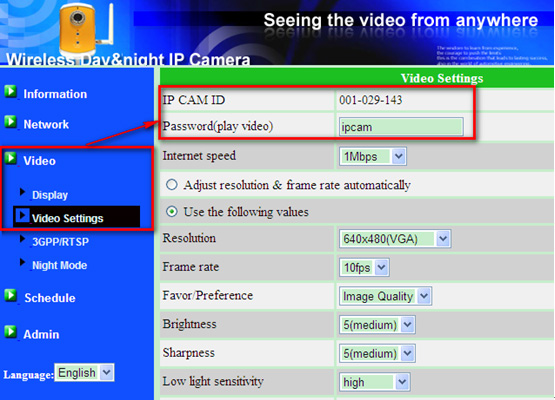
3. After entering into web configuration page, please click on video settings. You will find the Camera ID and password in this section.
4. After entering into web configuration page, please click on video settings. You will find the Camera ID and password in this section.
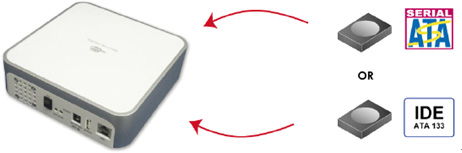
- Step 1. Install NAS
Follow the installation guide from your NAS supplier, put HDD into NAS device, and connect the NAS device into network.
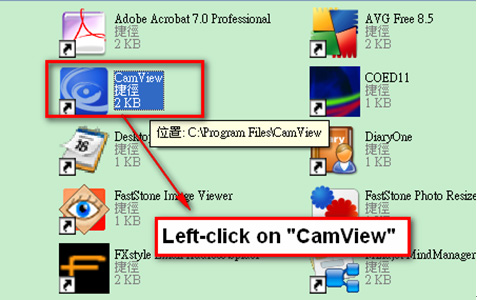
- Step 2. Open CamView Software
Open CAMVIEW Application by Left-click mouse button
- Step 3. Go to IP camera’s “Web Configure” Page
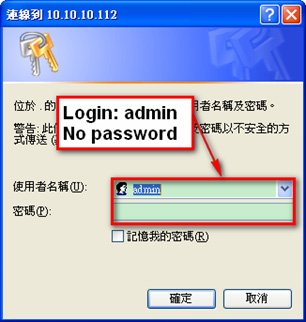
Right-Click on CAMID to access the web
Login is admin with no password
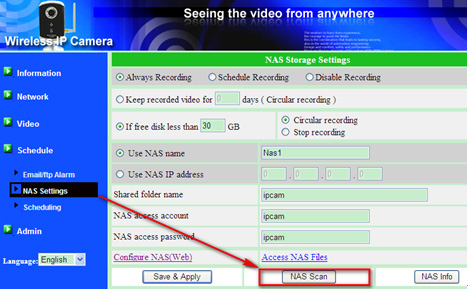
- Step 4. Scan for the NAS device
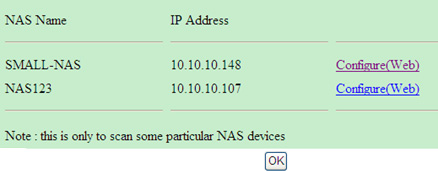
Go to NAS Setting -> Click NAS Scan to find out the NAS name and IP Address.
After clicking the NAS Scan, you’ll be able to find the NAS Name and IP Address of the connected NAS device.
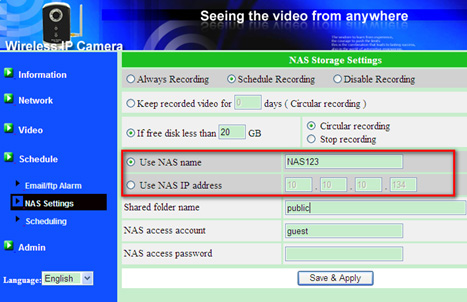
- Step 5. Configure the Recording
Example: NAS IP Address is 10.10.10.107 / Name: NAS123
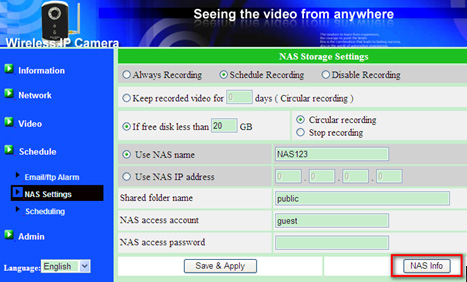
Make sure everything is correct, Save & Apply, you’ll see NAS Info tag Now all recorded video will save to NAS device automatically without PC
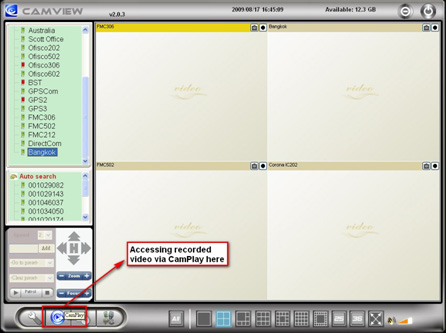
- Step 6. Use the CamPlay software to play back the recorded video files.
Use the CamPlay software to play back the recorded video files.
You can use the Microsoft Network Neighborhood to find the NAS device and attach the NAS as a new drive and then use the Camplay to playback the videos.
1. Camera ID is exclusive to your IP camera and can not be changed.
2. The password is changeable and up to 20 digits/characters.
3. Internet Speed is depending on your internet upload bandwidth. Please divide your up-load bandwidth to the number of your IP camera. For example, if you have upload bandwidth at 986Kpbs and you have 4 IP cameras. We suggest setting your IP camera Internet speed at 256Kpbs.
986Kbps /4 = 246 Kbps. Please set IP camera Internet Speed at 256Kpbs or 128Kbps.
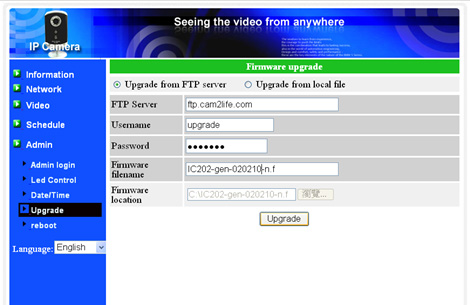
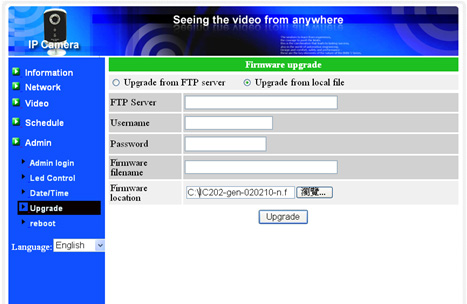
First way:from FTP Server
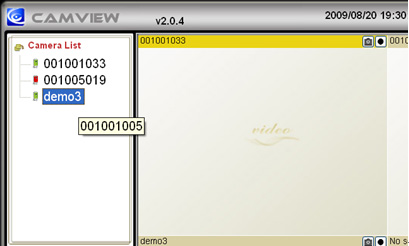
1. Make sure the network camera is connected to Internet and located in the same LAN with the computer where CamView is running on.
2. Open CamView software and the IP Cam (Cam ID) appears under Auto Search list and right click on the Cam ID and click “Web Configure” to get into the web page of the IP Cam. The default login account is admin and no password.
3. Please go to upgrade page for upgrading.
4. Enter the FTP server address, Username, Password, and Firmware File Name.
FTP:ftp.starvedia.com
Username: upgrade
Password: upgrade
File Name: IC202-gen-020210-n.f
5. Click Upgrade button and wait few minutes for the upgrade.
Second way:from local file
1. Get the new firmware from our ftp server, go to ftp://ftp.starvedia.com and login account and password are “upgrade” and “upgrade”, respectively.
2. Copy the one you want to upgrade to your computer. Ps. The file name of the firmware you should download looks like this, IC202-gen-020210-n.f
Once you have the new firmware, go to upgrade page and click “Browse” button to locate the firmware in your computer and then click “Upgrade” button to do the upgrade. That’s all and you just wait a few minutes for the upgrade.
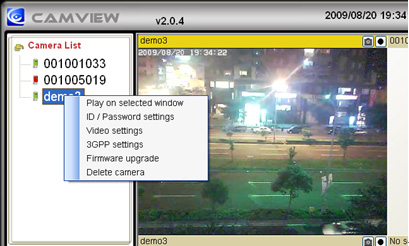
When your network camera and computer are not at the same sub-net, you will not be able to locate that network camera by “Auto Search” and you will need to remotely upgrade the firmware.
- Step 1. Please locate the IP camera you want to upgrade by clicking on it.
- Step 2. Please find “Firmware upgrade” under “Settings”
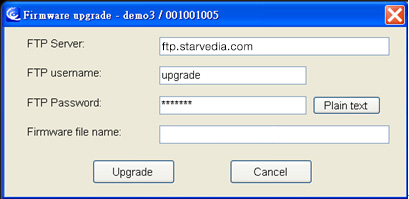
- Step 3. Please Type in info as list below.
- FTP Server: ftp.starvedia.com
- FTP username: upgrade
- Password: upgrade
- Firmware file name: please consult your Sales for the latest file name.
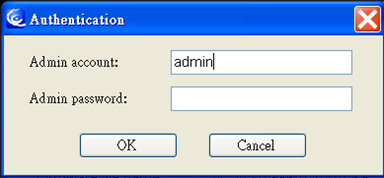
- Step 4. Type in your admin account user name . Default setting is “admin” and click OK
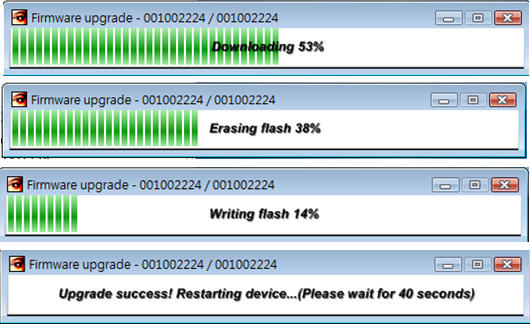
If the file name is correct, you will see “downloading” “Erasing Flash” “Writing Flash” and “upgrade success”. The major cause of remote upgrade failure is wrong “Firmware file name:” Please ask for the latest firmware list from your sales representative.
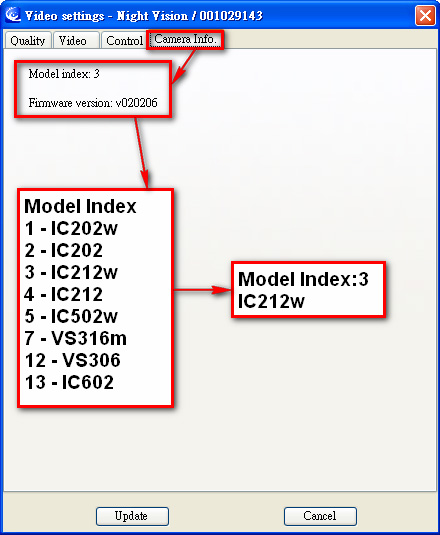
How to read the Camera Info
The “Camera Info” is on the “Video Settings” of CamView for each network camera.
Disk storage size of video recording for the network cameras
unit : Giga Bytes/day
Either recording to CamView, NAS or Micro-SD card
The storage size is independent of frame rate
| Bandwidth\media |
Video(per day) |
Audio+ Video |
| 64k |
0.7GB |
1.38GB |
| 128k |
1.3GB |
2.07GB |
| 256k |
2.7GB |
3.45GB |
| 512k |
5.5GB |
6.22GB |
| 768k |
8.3GB |
8.98GB |
| 1M |
11GB |
11.7GB |
| 1.2M |
13.8GB |
13.2GB |
| 1.5M |
16.6GB |
16.5GB |
1. Plug the network camera into the network.
2. Find the network camera from the “Auto search” on CamView.
3. Open “Web configure” page with right-click.
4. Login the web page with “admin” / no password.
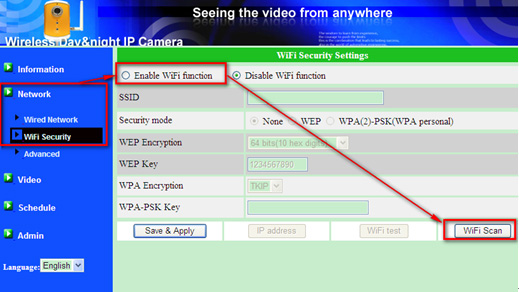
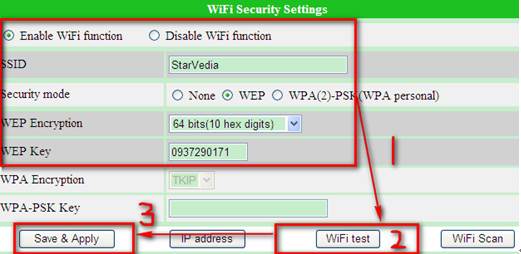
5. Enable WiFi Function( Network -> WiFi Security -> Enable WiFi Function )
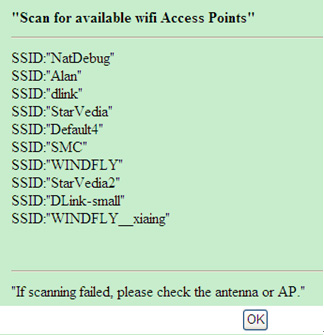
6. Click on “WiFi Scan”, all the AP nearby will be displayed. Choose the SSID of your AP. Then,Click OK when finished.
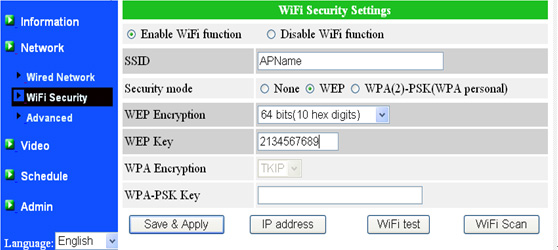
7. Key-in the SSID, and the “Security mode” and key of the AP.
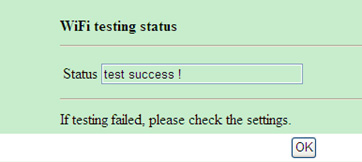
8. Run “WiFi Test” when ready.
( If SSID and WEP Password is correct, you’ll see “Test Success!” )
9. Click on “Save & Apply”.
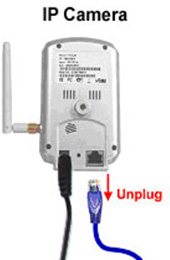
10. Unplug the Ethernet Cable to enable WiFi function.
- SMTP server is a computer server that sends the email for you.
1. If you are using Microsoft Outlook, you can find your SMTP server under “Tool”-“Email accounts”-“SMTP server”.
2. You could ask your internet service provider for SMTP server address. For example, AOL’s SMTP server is “smtp.aol.com”.
3. For most of the company’s email system, you could get the SMTP server from your IT personal
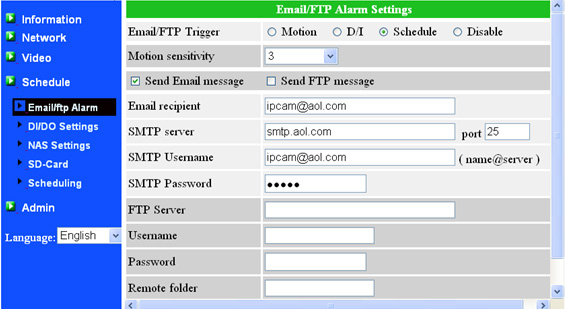
- Please refer to the figure below.
1. SMTP Username : should be your email address for example: ipcam@aol.com
( for some special case, just key in the name without @xxx.xxx if the full email address does not work )
2. SMTP Password : is the password of your email account.
3. Port : the port of the SMTP service, should be 25 most of the time.
4. SSL : the IP camera does not support SSL security, so, need to make sure the SMTP server does not need SSL security.
When doing the SMTP Server Test, the result is: SMTP Server not exist. That could be out of two reasons:
1. Your SMTP settings is not correct, please refer to the above information.
2. Your IP Camera is not connected to the internet.
Make sure the IP camera is connected to the Internet by checking the “red led” on the camera body. When the “red led” is always on, the Internet connection is OK. Otherwise, if the “red led” is flashing on and off, the IP camera is not connected to the Internet.
Motion detection is a big issue for all IP cameras; we can correctly send email when there is a motion. But cannot identify the motion types, so, there will be false alarm for blinking light, swing leaves and other moving objects.
The motion detection is an issue for specific intelligent video, that’s not our segment. We have largely improved this issue by providing 10 levels of detection sensitivities.
CAMVIEW SOFTWARE
No. For security issue, we do not allow users to make their passwords for playing video empty.
You can do the video recording of the network camera to the computers through CamView software and you could have full functions of the recording schedule. The accompanied CamPlay software is then needed to play back the recorded video files.
Yes, when you are using CamView software to connect the network cameras, at most 36 cameras could be connected and viewed at the same time. But for this situation, very powerful and large enough memory size are required.
Yes, you can do some video setting's modifications. You can change the resolution, frame rate, bandwidth, microphone, auto select settings of IP Cam through CamView. The rest of the settings can only be configured via the web page of IP Cam.
IP Cam needs some time to re-initialize the system. Therefore, please wait 5 seconds and try to connect it again for playing the video or getting the settings.
The IP Cams (Cam IDs) under the Auto Search List are located in the same Local Area Network with the CamView. Hence, the web page is accessible for sure. Regarding the Cam ID located in CameraList, there is no way to access to its web page if it is behind a router/NAT. Therefore, "Web configure" item will not be available for CameraList.
CamView program is developed based on Microsoft .NET Framework 2.0. Therefore, it is a must to install it and the version of it must be 2.0 or later. Since the CamView installation program will detect if your computer already have installed the .NET Framework, you can just leave the installation program check this for you. You can also download it from Microsoft web site as following:
http://www.microsoft.com/en-us/download/details.aspx?id=21
For Windows Vista and Windows7, it's not needed to install .NET framework.
Yes. You can run CamView on Vista.
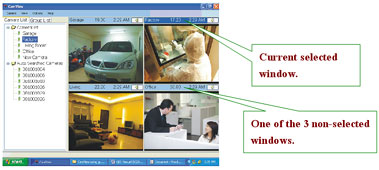
The audio you heard is from the current selected window. See below.
Download: https://www.starvedia.com/download.html
Regarding the CamView, there are two versions. One has the “Microsoft .NET Framework” and another has not – “No .NET”.
Which one is the one you should install? The one with .NET Framework is always the safe choice. But if you have to download it from the remote site, it might take you SOME time due to the huge file size of it. So the cases you can install the “No .NET” one are as following:
1. Your Windows version is Vista or Windows7, which already has the .NET Framework installed.
2. You have installed the .NET Framework earlier either by installing the CamView with .Net Framework or by installing the .NET Framework manually or by some other programs which need .NET Framework to work properly as well.
Anyway, pay attention to the final screen of the installation of the CamView which indicates whether the CamView is going to work correctly or not.
There are three scheduling modes on CamView:
1. Play only
2. Continuous Recording
3. Periodic Recording
| Scheduling Modes |
Brief description |
| Play Only |
Play selected IP cameras at selected windows for a period of time. |
| Continuous Recording |
Record selected IP cameras at selected windows for a period of time continuously. |
| Periodic Record |
Record selected IP cameras at selected windows at pre-set time range for everyday or every week days. |
Notice: Only one schedule could be set for each CamView Window.
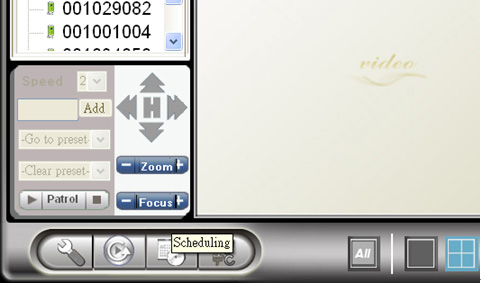
- SETP1. Start the "Scheduling"
Click the “Scheduling” icon at the bottom of CamView.
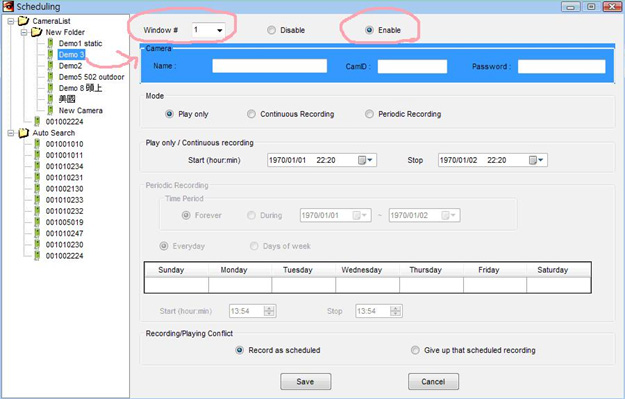
- SETP2. Select the window and IP camera for scheduling
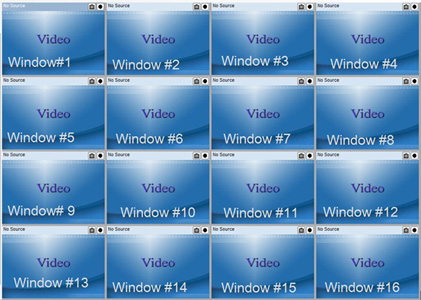
1. Select Window#, the following is the Window# sequence.
2. Click “Enable” to enable the scheduling for this window.
3. Double-click the IP camera under the “Camera List” for the scheduling of the camera on the selected window.
- SETP3. "Play Only" or "Continuous Recording"
1. If you select "Play only" or "Continuous Recording" , then you need to set "Start time/date" and "Stop time/date" for the recording/playing time range.
2. On the “Recording/Playing conflict”:
- "Record/play as scheduled" will do the scheduled playing or recording even if there is some other video already
playing on the selected window.
- "Giving up that scheduled recording/playing” will not do the scheduled playing or recording if there is some other
video already playing on the selected window.
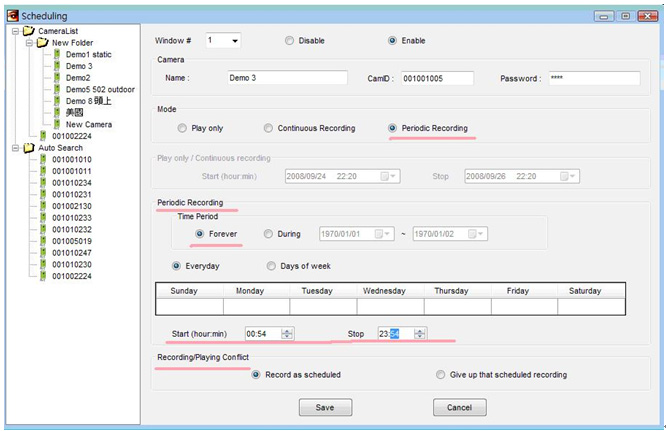
- STEP4. Periodic Recording
1. Select "Forever" if want to do the record periodically forever, otherwise, select the "During" time range selection.
2. Select "Everyday" if the recording is doing everyday at the same time, otherwise, select "Weekday" if the recording is doing only for some days of the week.
1. Set the start and end time of each day for recording.
2. On the "Recording/Playing conflict":
- Record/play as scheduled” will do the scheduled playing or recording even if there is some other video already
playing on the selected window.
- "Giving up that scheduled recording/playing” will not do the scheduled playing or recording if there is some other
video already playing on the selected window.
PHONES
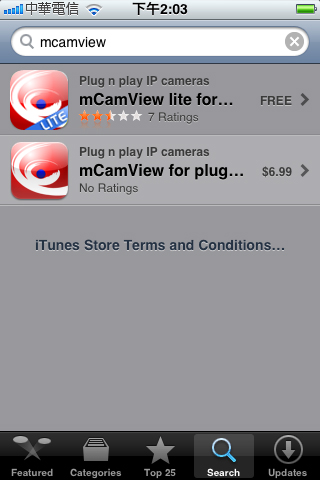
- Step 1. Search "mcamview" on App store. (Here we take iPhone paid version for example.)
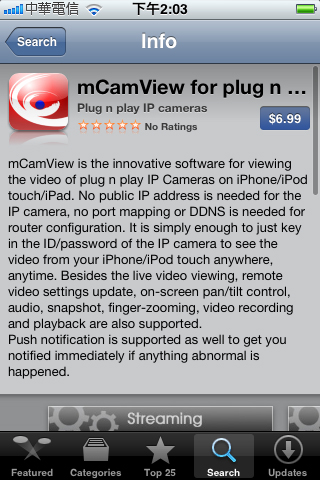
- Step 2. Click "$6.99" button.
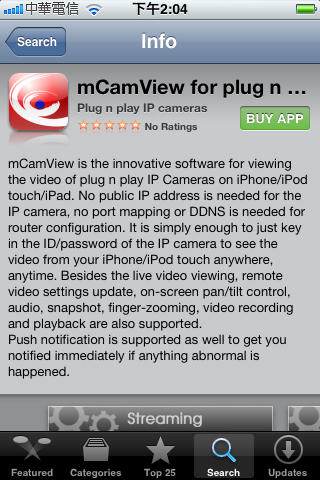
- Step 3. Click "BUY APP" button to start installation.
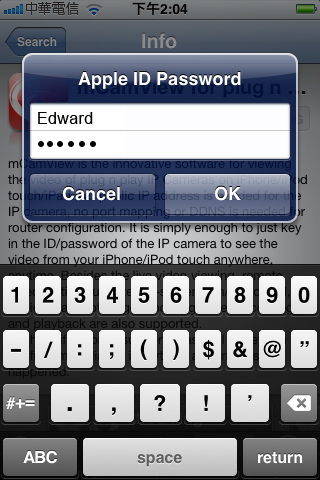
- Step 4. Please key in your Apple account and password.
Start installation.
Installation finished!
- Step 5. Now, you can run mCamView to manage your IP camera!
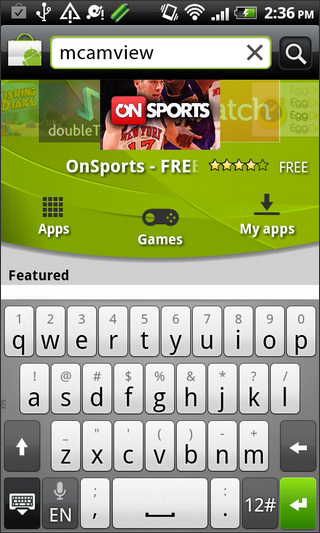
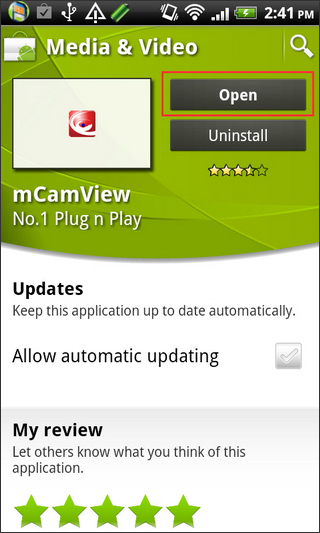
- Step 1. Search "mcamview" on Android Market.
- Step 2. Click "mCamView" to start installation.
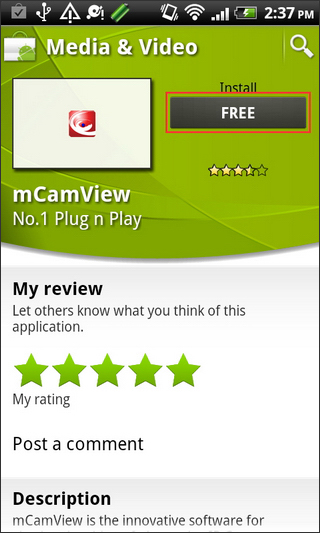
- Step 3. Click "FREE" button.
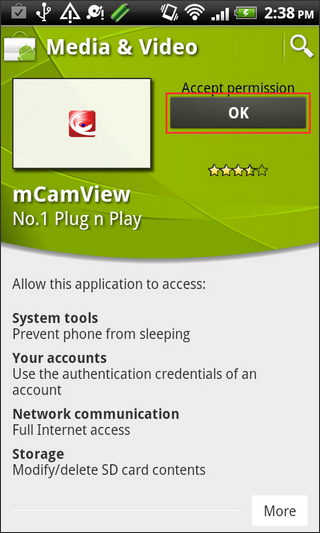
- Step 4. Click "OK" button to start installation.
- Step 5. Installation finished! Click "Open" button to run mCamView.
- Step 6. Now, you can start to manage your IP camera!
Please go to stream settings, and check the settings status is "normal" instead of "mobile", if it still doesn't work, please send back to StarVedia for the RMA Service.
Please go check the ID/Password, after resetting to factory default, the web configure username is "admin" and no password, video-play password is "ipcam", if you are still not able to view the video, please contact with service@starvedia.com
Please follow the steps below:
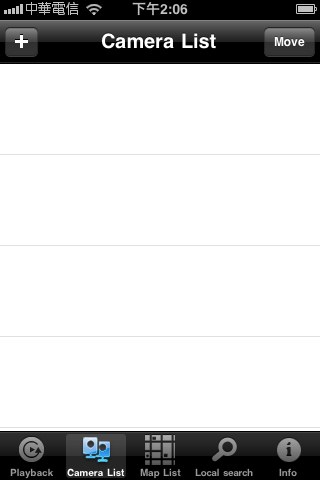
1. Open mCamView on your iPhone.
2. Select the IP Cam you would like to enable in the Camera List and click the arrow button to get into the ID/Password page.
3. Select "Push notification" and then enter your admin username and password.
4. You can enable the trigger source: motion, sound or both, depending on what you need.
5. Click "Update" button, now you will receive push notification messages from mCamView software.
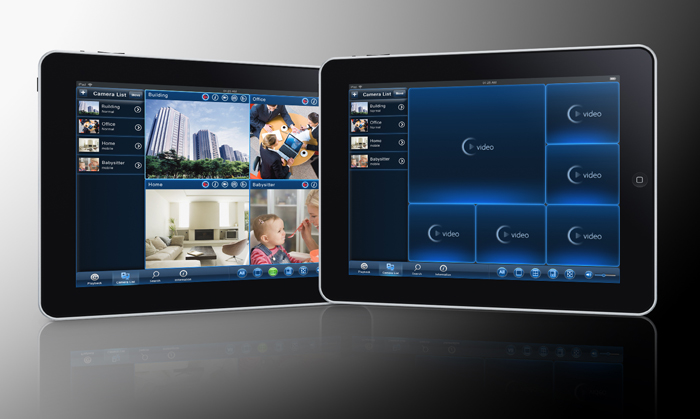
Yes, we launch a new app "mCamView HD" which is designed natively for iPad. Please "mCamViewHD" on App store.
Please follow the steps below:
1. Open mCamView on your iPhone.
2. Go to "Playback" page.
3. Select the recorded file you want to convert to AVI file.
4. Click the arrow button and convert it.
Please go to check 3GPP settings. If it's off, please turn it "ON".